Wednesday, January 31, 2018

7mm-08 Project #16

Stock Shaping 

I am going to show you a few examples of the detail cleanup work that is done on the stock. I don't have pictures of all the work that was done but this is an example of the cleanup in two areas.
Initial sanding and shaping of the stock has started. Most of the rough machine marks on the outside of the stock have been filed off and sanded smooth. Now I start the detail work. 
 Here is the ejection cutout after inletting. It is a nice clean fit but I like to dress this area up a little. 
 
 I first start by extending the radius on the sides further down the stock. I call this cutting in the fangs. 
 Then I file the area between them flat, this is a picture part way through the process. 
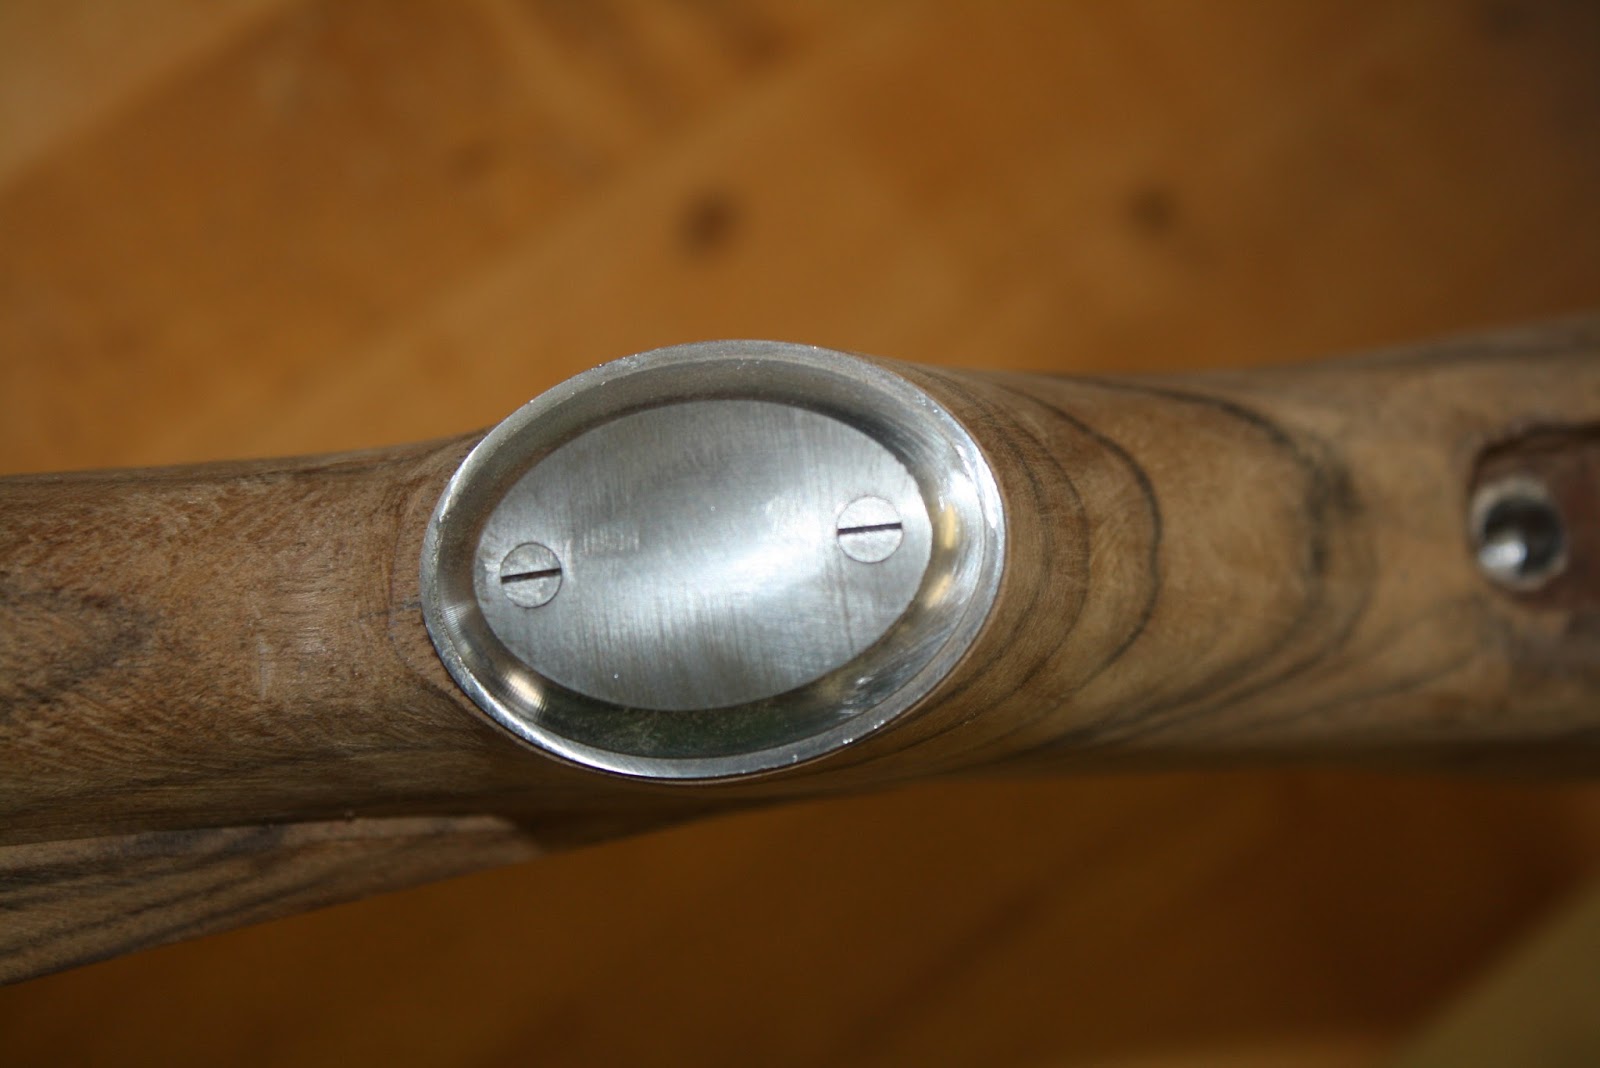
Here is the completed cutout ready for final sanding. I think that this adds a nice touch. You can also see that the ebony cross bolts have been sanded down and cleaned up. 
 Then I turn my attention to other areas of the stock that need to be cleaned up. Here the top of the grip is getting cleaned up. This is the grip in the rough form. 
 Here I have started to contour the grip to a more pleasing contour. 
Here is the grip finished ready for final sanding. 

This process is completed in several other places of the stock but I don't have pictures of all of them. 

Monday, January 29, 2018

7mm-08 Project #15

Finishing up the Recoil Pad

In this post I will complete the recoil pad installation. 
First the recoil pad is mounted on the stock and a line is scribed around the edge of the pad where the stock meets. This will be a reference during the sanding down of the pad.
 I like to use a recoil pad fixture. This allows me to mount pads on stocks that are finished without marring the finish (not an issue with this stock but it is my preferred method). Here I am setting the stop on the fixture so that after I grind the toe of the pad I can return the fixture to 90 degrees to grind the other sides. 
 Then I set the angle of the toe of the pad. I will start grinding with the toe and then return the fixture to the stop I set in the previous step for the sides and the top. 

 The pad is mounted in the fixture upside down and the scribe line is filled with chalk dust to that it can be seen easily. Here I am grinding the toe angle. 
 Once the toe is complete I return the fixture to the stop I set and grind the sides and top. You can see that the layout line is still visible on the sides and top but not the toe area that has been completed. 
Here is the finished pad mounted to the stock. It is starting to look like a Rifle! 

Sunday, January 28, 2018

7mm-08 Project #14

Recoil Pad 2

Installation of the recoil pad continued.
 The center line of the stock is marked and one of the hole locations is marked and center punched for drilling. 
 Here the top hole is drilled. From here a jig will be used to identify the location of the bottom hole and hold everything during the gluing operation. 
 The second hole has been marked and drilled and everything is fit checked prior to gluing. The aluminum piece is a jig that I made to hold everything in place. The jig has the same hole spacing as the recoil pad. This will insure that everything lines up after bonding. Sorry about the blurry picture. 
 Epoxy has been applied and the jig assembly is taped down to hold everything in place while the glue cures. 
Here is a shot of the brass spacers bonded in ready to accept the recoil pad. Finish has been applied to seal the end grain. 

Saturday, January 27, 2018

7mm-08 Project #13

Recoil Pad 

Just like the grip cap I like to use brass inserts when installing recoil pads. This does several things but most importantly in insures that the pad always lines up in the same place after installation and removal. It also creates a much stronger mount than putting wood screws into the end grain. Plus I think that it is a nice touch and worth the effort.
 Here is a brass machine screw getting the head cut off in the lathe
 Drilling a hole to accept threads for the mounting screws. 
 Tapping the hole to accept the mounting screw.
 Here are all the components ready to mount on the stock. I have the wood screws that came with the pad shown for reference (they will not be used). I have also included the screwdriver bit that I use to install pads. This is a standard Phillips bit, but I have polished the outside so that it does not mar the recoil pad holes when tightening the screws. It is important to lubricate this bit with, soap, water, or wax when installing the pad so the screw holes don't get marred. 
 Here I am laying out the cut line for the stock. At this point you can adjust the angle of the pad. I usually make mine 90 degrees to the bore line.
Here is the stock cut down ready to start installing the pad. Cutting the stock always makes me nervous! 

Friday, January 26, 2018

7mm-08 Project #12

Grip Cap Cont.

After installing the grip cap the profile of the grip needs to be shaped. As you can see the semi-inletted blank has a lot more material in the grip area than we need. It will have to be filled down to match the profile. 
 First the front is filed almost down to the grip cap.
 Then each side is filed down starting 45 degrees from the front. The line of the filing is carried all the way up the grip.
 Then two more flats are added, and carried up the grip.
 This is done until you have many flats filed up to the cap. This looks like a radius but it is actually many flat facets. If you look close you can see them. 
Then you smooth out the areas between the flats and you end up with a curve that matches the grip cap. The wood is left a little proud of the cap at this point. It will be brought down to the cap during the stock sanding. 

You can see that the screw heads have also been dressed down to the cap. The cap and screw heads will be polished later. 

Thursday, January 25, 2018

7mm-08 Project #11

Grip Cap

I chose to install a metal grip cap on this rifle. The first thing that I needed to do was flatten the grip cap surface. I chose to do this in the mill because it is really easy to make a flat surface with a milling cutter. 
 First I made some tooling to hold the stock in the mill. This was in the form of a piece of aluminum angle with a few holes drilled into it so I could bolt it to the stock and an angle block on the mill bed. 
 Then I used a 1/2 inch cutter to mill the surface down. 
Here is the surface ready to install the cap. Nice and flat and at the angle that I wanted. Sometimes it takes more time to make the tooling for a task than it does to do the work. But I have found that it is really beneficial to take the time to make good tooling to hold things when machining. 
 Here are my supplies that I used for the grip cap. As I have said in other blog posts I don't like to screw directly into the wood. I like to make threaded brass inserts. I think that the brass inserts make a stronger joint, don't have any issues with splitting wood, and make lining up the screw heads easier and more repeatable during disassembly. 

Again I use a brass machine screw to make the inserts. The external threads on the machine screw give the epoxy a lot of surface area to bond to and it is a cheap easy way to get the brass material. 
 First I mount the screw in the lathe, cut it to length, and drilled a hole.
 Then the hole is threaded to accept a machine screw. 
 Here are the inserts assembled on the grip cap
 The stock is then drilled to accept the inserts. 
 Here the cap is getting test fit prior to bonding. 
Here is the cap during the bonding operation. 

As you can see a lot of material needs to be removed from the stock. I will cover that in the next blog post. 

Wednesday, January 24, 2018

7mm-08 Project #10


Ebony Tip Continued
In this post I will finish up the installation of the Ebony Tip
 The ebony tip is cut to length and the waste cut off it used to help in the layout of the front radius. A compass is set to create a guide line for filing/shaping.
 Here you can see the compass scribe line and a scribe line on the side for shaping. An angle will be cut between the two lines with the plane to start the shape for the front radius.  
 Here the angle has been cut. 
 From here additional small angles are cut until the shape is a faceted radius. 
Then the tip is sanded and smoothed to a final radius.

The tip will get more sanding during the finish sanding of the stock.

Tuesday, January 23, 2018

7mm-08 Project #9

Ebony forend tip continued


 The band saw is used to remove the majority of the waste
 Here you can see the waste pieces that were cut off
 A plane is used to bring the bottom and sides down even with the rest of the stock. Because the ebony is so hard the plane does a really nice job. 
 A straight edge is used to confirm that the tip is flush with the top, bottom, and sides of the stock. It is also used to check that the tip tapers with the lines of the stock. 
 Then facets are cut. This is the beginning of the shaping.  Starting with 2 on a 45 degree angle, then more are added until the tip almost follows the profile of the stock.

 After the facets are cut they are blended together to conform to the shape of the stock. It is important to use a straight edge so the tip has the same taper as the stock.
 Layout lines are added in preparation for the barrel channel. 
Then the barrel channel is roughed in. It will be brought to complete depth once the front of the ebony tip is complete.