Tuesday, March 27, 2018

Holland and Holland Royal

My Holland and Holland Royal.

When I was in my early 20's I read an article in Gun Digest about a London Gunmaker by the name of Holland and Holland. Something about the story captivated me and at that point I became a little obsessed with Holland and Holland. I read everything I could about them and decided that I needed to own a 12 Bore Royal some day.

I set out on a quest for my own Holland and Holland. I searched high and low for a nice example that was in my price range (remember I was in my 20's). Eventually I found this gun in a shop outside of London. I arranged to have it shipped to the US and did the import paperwork myself. Paying someone to import if for me was out of the question. I simply could not afford it. 

It is a 12 Bore, Holland and Holland Royal with Damascus Barrels,  built in 1892 for a Mr Butterworth of London. From the proof marks the gun was in service for many years and probably had many owners before it came to rest in my hands.


The Gun came in its original case, but after over a 100 years it was a little rough so I build this Oak and Leather case for it. 
Here is a picture of the beautiful Damascus Barrels. 
 I often wonder what ever happened to Mr Butterworth and if he would approve of me taking care of his Shotgun


All in all not a bad Shotgun for a 20 something year old to own. 

Funny story I was at a Dinner party once and an older gentleman was talking about Holland and Holland and implied that I was too young or unsophisticated to know anything about them. He was very surprised when I told him that I did know who they were and that I owned a Royal.  

I have tried to sell it a few times but my Wife wont let me. She has decided that it is hers and that I am not allowed to sell it. So instead I think that I will take it back over to England for a Driven Pheasant Shoot some day. 

Monday, March 26, 2018

Leather Strop Making

Making a Leather Strop

My Old Leather Strop was getting a little worn so I decided that it was time to make a new one. My old one was 1 inch wide by 6 inches long. It was a handy small size and worked well but for my new one I wanted to make something a little bigger. 

After scrounging around in the hardwood bin I found a nice piece of Mahogany that would work great for the strop. 

 I played around a little with the shape and eventually came up with a paddle shape that had a handle on the end. I used a paint can to make the radius transition between the wide and narrow portion of the strop. 
 Then off to the band saw to cut it to size. 
 Here is a Tip: If you are going to counter sink a hole in wood. Do the countersink first then drill the hole. This will create a clean countersink and avoid the chatter and rough edges. 
 Here is the clean countersunk hole complete. 
 I decided that I wanted one side of the strop with the rough side out and one with the flesh smooth side out. I will charge the rough side with compound and leave the flesh side bare for final stropping. 
 A little contact cement to bond the leather to the strop. 
Here is the completed strop all that needs to be done is to charge it with compound and it will be ready to sharpen, knives, chisels, plane irons, gouges, etc. 

Tuesday, March 13, 2018

Vineyard Update

March Vineyard Update

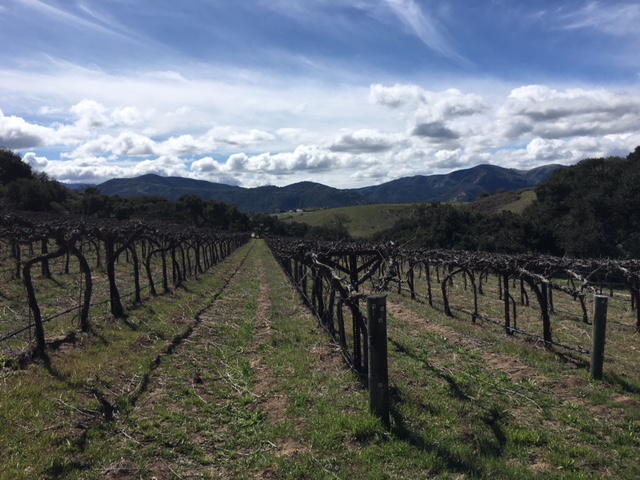
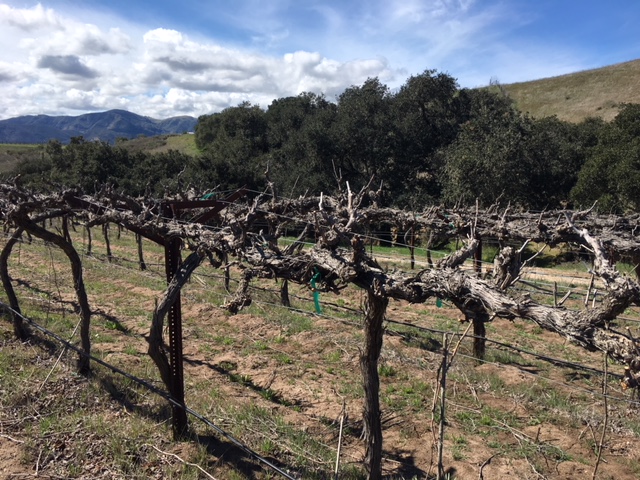
The vines are all pruned back and are currently dormant. They are waiting for spring to come and they will wake up and push new buds that will eventually produce lots of leaves and hopefully lots of great quality Syrah grapes.


 There is not a lot going on in the vineyard at this time of year. If we continue to get rain I will have to put some effort into weed control. But for now things are pretty quiet.


Once the buds show up the work starts. But for now it is a quiet time in the Vineyard.

Thursday, March 1, 2018

Knife Sheath

Making a Knife Sheath.

After making my first knife it was time to make a knife sheath for it. I am left handed and always wanted to carry my  knife on my left hip. So I decided that this was the perfect opportunity to make that happen. 

First step was to create a pattern. I had an idea of the shape that I wanted but have never made a sheath like this before. So I decided to leave the material long on one side and trim it to size once I bonded and stitched the two pieces together. 

Here you can see the pattern that I made out of thin cardboard sitting on the leather prior to cutting. 

 Here is the pattern of the sheath and the rand that will protect the stitching prior to the first bonding step. 
 Here I am bonding the rand in place prior to wet forming. I use Boston Clips to hold the leather in place during the bonding.
 In preparation for wet forming I cover the blade with tape and cover the whole knife in plastic wrap to protect the wood finish from the moisture. 
 After I wet formed and bonded the leather. I punched holes for the stitching. 
 Here I am starting the stitching. I prefer to use a double needle "saddle stitch" because it makes a stronger and more reliable joint. 
 Once it was all formed and stitched I added a little embellishment, nothing too fancy just some subtle lines and a stamp. 
 Here is the finished sheath. It still needs to be oiled and treated. 
 I am quite happy with how it turned out.