Every serious bird hunter needs a bird knife, it is an essential bit if gear that you can't live without. If I had to choose between my bird knife and shotgun shells, I would pick the bird knife every time.
Actually that is false, to be completely honest I have never been successful at using the gut hook on my bird knife, and I usually make a mess of a perfectly good quail when trying. That being said I think that a knife is a very useful tool, and I carry one daily. Since I have a bird knife I figured that I might as well carry it when bird hunting.
My bird knife is very special to me, it was a Christmas gift from my father. It is a Boker Brand Bird Knife and I have carried it in the field for a few years.
I decided that I wanted to make a knife sheath for the bird knife that would mount to my bird vest. I use a Filson bird bag and it is pretty minimalist, so having a sheath for my knife will free up some pocket room.

As with any other project the key is in the planning. For this sheath I am going to wet form the leather to make a pocket that will fit the knife. You can wet form leather in many ways, but for this project I am going to wet form the leather over a mold to make the pocket.
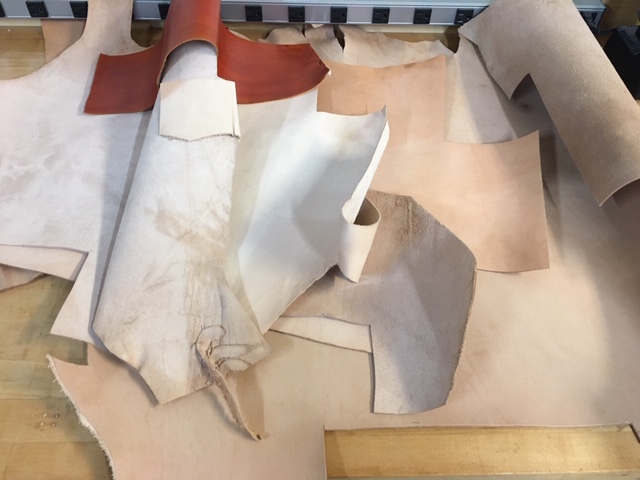
The first step is to make the mold. I did not take any pictures of the mold making. But essentially you make two pieces that the leather will be pressed between to create the shape you want. Here are some of the molds that I have made in the past for other projects, with the bird knife mold in the front.
The molds don't need to be fancy. All of these molds are made with scrap wood and cutoffs that I have saved from other projects.

After the mold is complete, then I got out my leather and selected a hide to work with. Because this is going to be used in the field when quail hunting I wanted a fairly thick leather that would be very durable. The leather that I used is 8 oz (roughly 1/8" thick) veg tanner leather. Veg tanned leather is the best for wet forming.

Then the leather is moistened with water. I believe that the proper term is "cased". For a shape like a knife sheath where the leather needs to really stretch I prefer to soak the leather in hot water for a few minutes and really saturate it.

Once the leather is saturated and pliable it is put on the mold. At this point I start the molding by hand and get the leather to form to the shape the best that I can. This also helps to keep it in place when the top piece of the mold is put on.

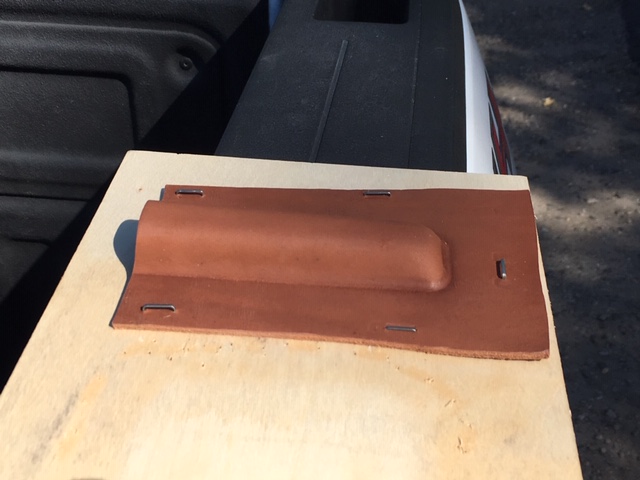
Then the top part of the mold is put on and clamped in place. This is where the shape really forms. The leather is left in place for several hours to set the shape and start to dry. Here you can see what the knife pocket will look like.

I have found that if left in the mold (forming tool) for too long the leather does not really dry well and can grow mold (the bacteria growth mold). So after a few hours I remove the leather from the mold and staple it to a board. The stapling is to help keep the shape and prevent any warping during the drying.
Here you can see the shape of the final knife pocket.
While the leather was drying I am made a pattern for the back/cover and the strap. I like to use manila folders for this. They are nice and stiff and are cheap. In this picture I am laying out the basic shape of the pattern for the two pieces.

No comments:
Post a Comment